The Basics of Working with GeoNet’s Webcam Images
Welcome, haere mai to another GeoNet Data Blog. Today we are going to take a look at our webcam images, how you can access them and some ideas on what you are working with.
Webcams were one of the first new data collection initiatives developed when GeoNet started. In late-2000, we had one camera looking at Ruapehu volcano and by 2005 we had four, and at the time of writing we have 10 cameras taking an image every 10 minutes. In total, there are more than 6 million images available to our users. Currently, all our webcams look at volcanoes, but our data set also has images from three webcams that documented the Christchurch rebuild from 2011 to 2019.
Accessing the images
We provide several ways of accessing webcam images, these are described on our web page here We’ll repeat some of the key information and provide example images so you can see what you get and the differences between them.
If you want to access the “latest” image from a camera you can get it at three different sizes: “large”, “medium”, and “thumbnail”. The idea is that you only need retrieve an image that is large enough for your needs. Our volcano camera web page shows “large” images, and our Volcano Monitoring Group find they are large enough for most uses. We’ll ask for images of Mt Taranaki taken from New Plymouth. You can put these URLs directly into your web browser and retrieve a latest image.
For a “large” size image.
https://images.geonet.org.nz/volcano/cameras/latest/taranaki.jpg
https://images.geonet.org.nz/volcano/cameras/latest/m-taranaki.jpg
https://images.geonet.org.nz/volcano/cameras/latest/t-taranaki.jpg
If you want images from a different camera, replace “taranaki” with a different camera_id, details are here.
So, this is what you get.
Our example images are from 4:40 PM on 21 June 2022, if you repeat the query, you won’t get the same images, as the latest images will be from a different date and time! The images are scaled to preserve their relative sizes.
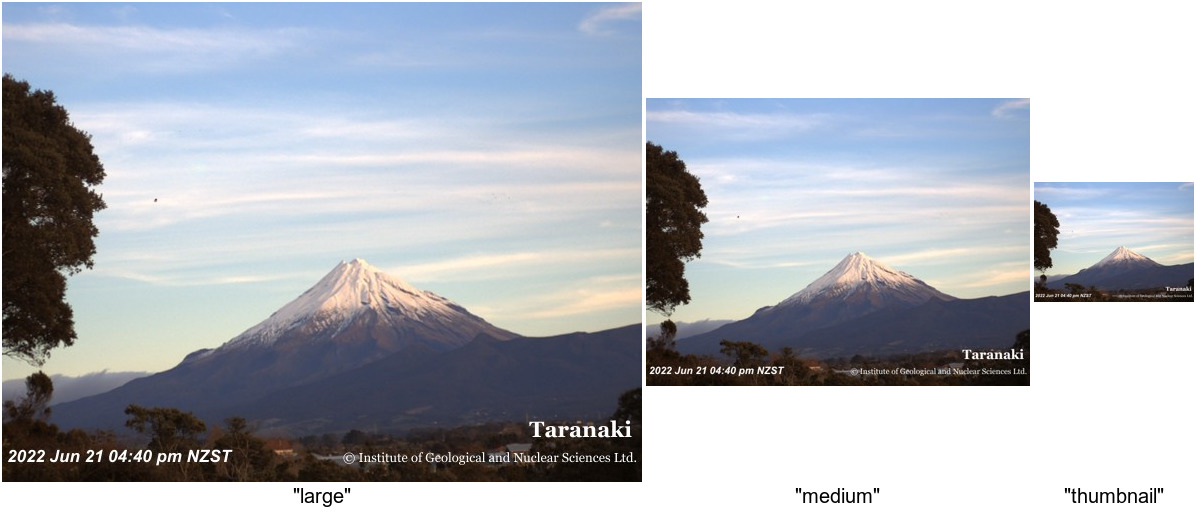
Example camera images
If you are really geeky and want to know how we joined the three images together, we used this command from ImageMagick, a free, open-source and cross-platform application for image manipulation using the command line.
montage -geometry +2+2 -pointsize 20 -label '"large"' taranaki.jpg -label '"medium"' m-taranaki.jpg -label '"thumbnail"' t-taranaki.jpg montage.jpg
You’ll also notice that when you request a “latest” image, it comes with the date and time written in the lower-left corner, and the view and GNS Science copyright in the lower-right corner. The writing on the images isn’t a permanent thing – it’s written on a copy to preserve the “original image” stored in our archive.
We’ve mentioned image size, but what exactly are the sizes of the images you can retrieve?
| Image | Thumbnail | Medium | Large | Orginal |
| Size (pixels) | 160 x 120 | 384 x 288 | 640 x 480 | 2048 x 1536 |
| Size (kB)* | 5.7 | 22.4 | 52 | 448 |
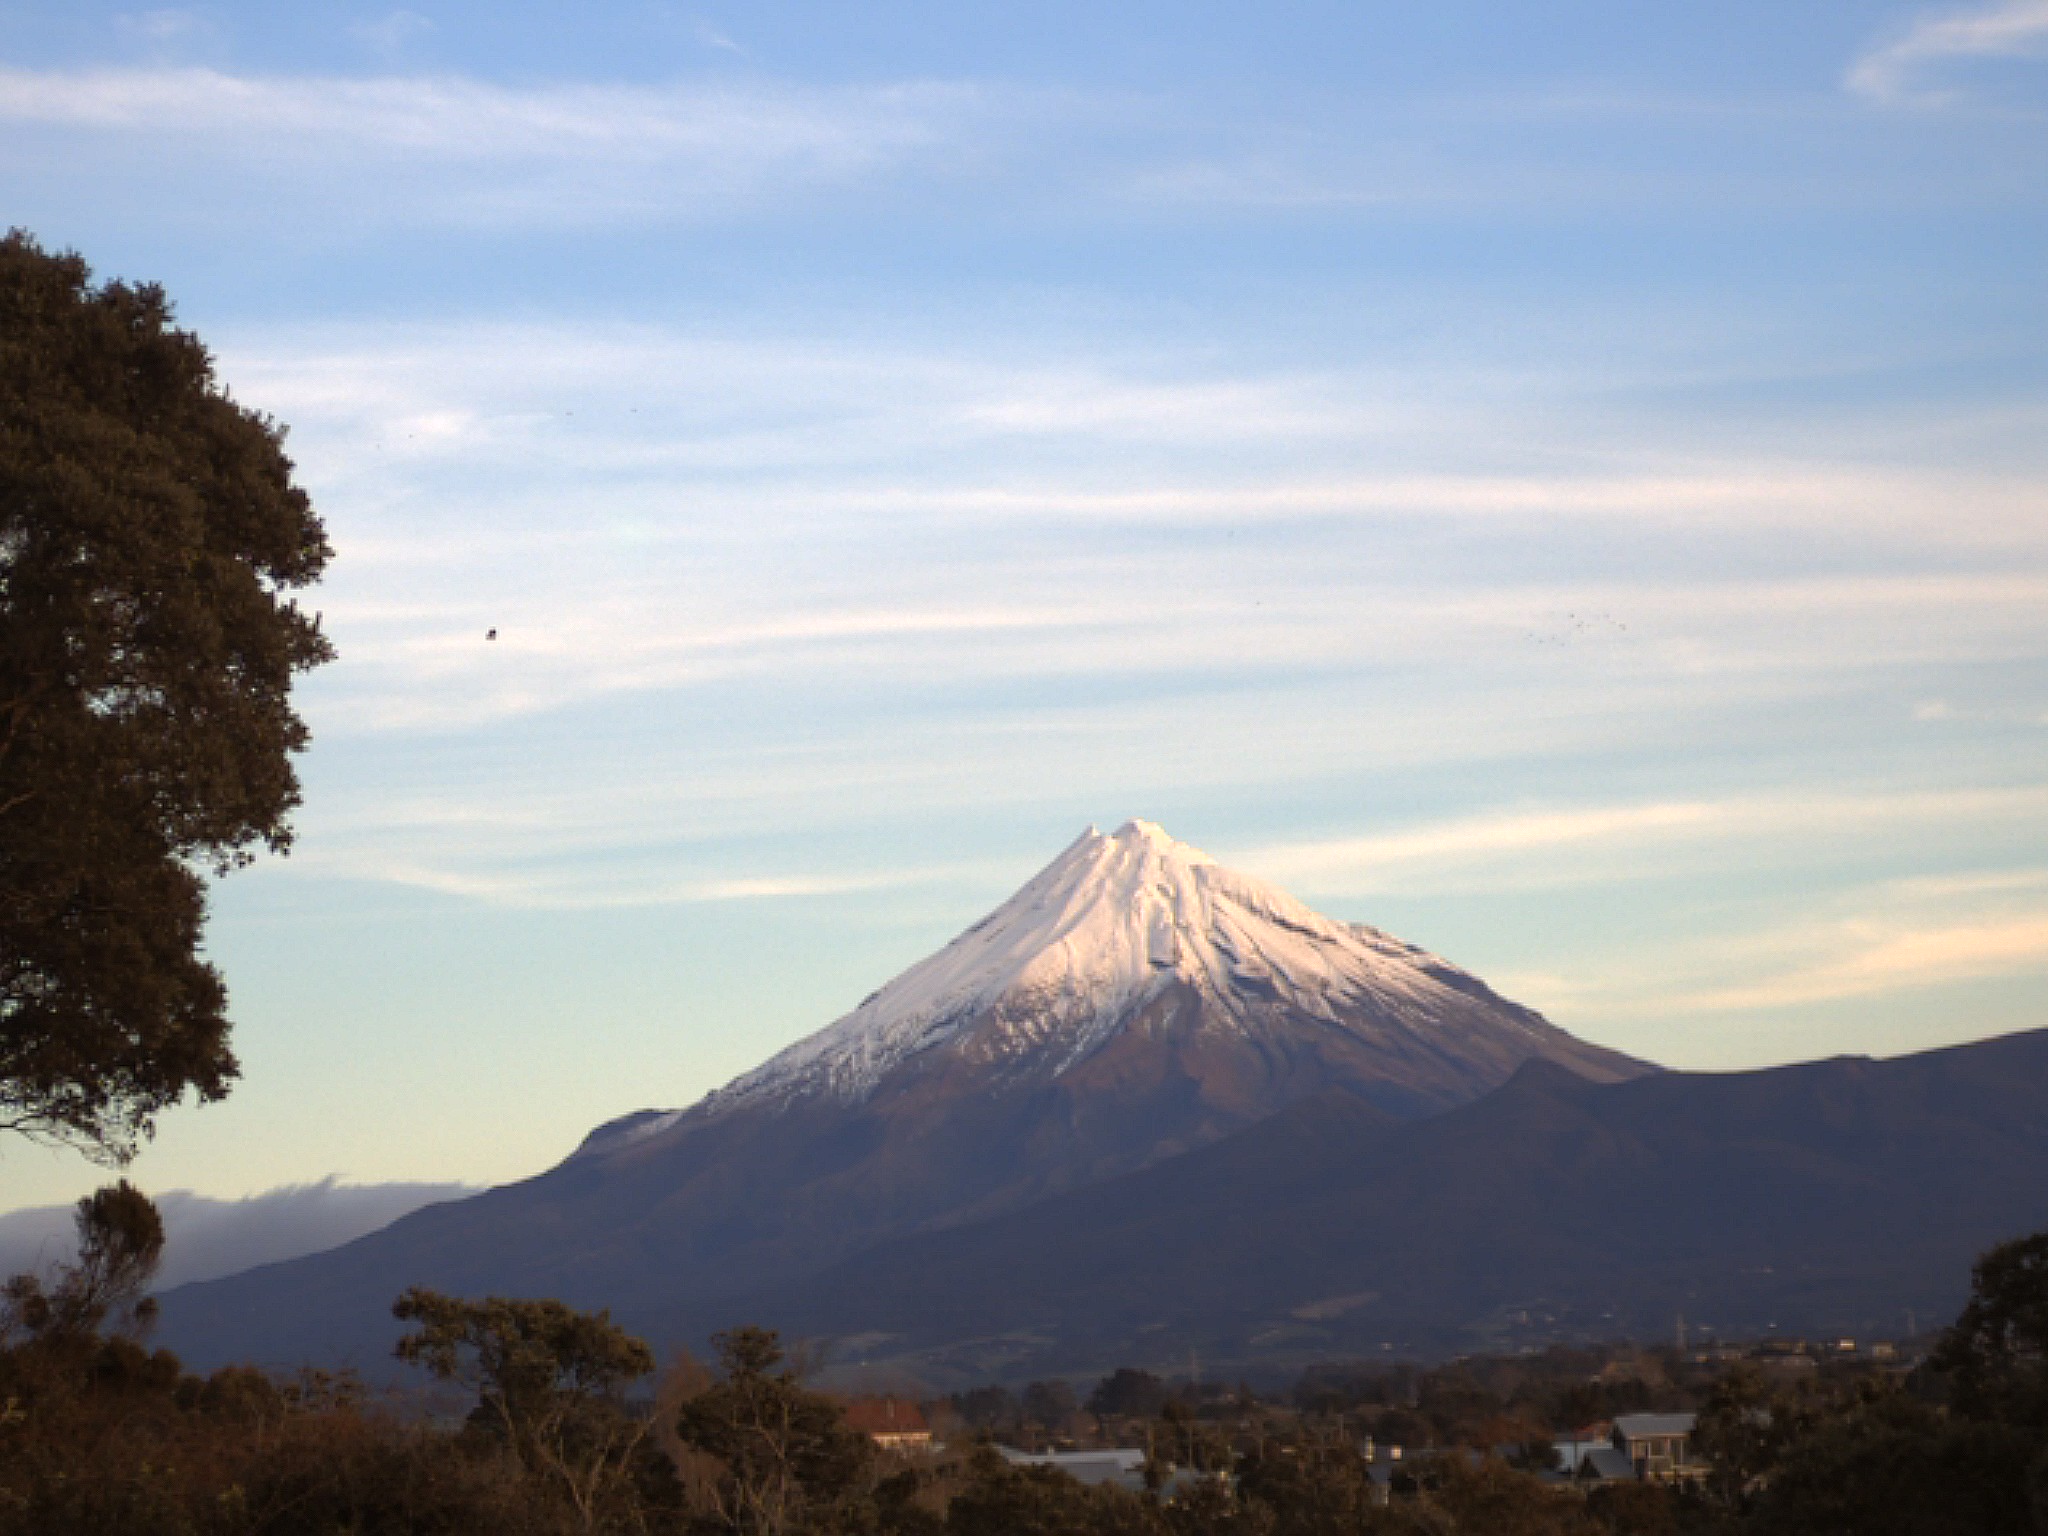
You’ll have noticed we included a fourth image size in this table: “original”. This is the image we store in our archive and is exactly what we retrieved from the camera. As you probably realise, all of the “latest” images you can retrieve are actually a small copy of the original archive image.
You can access all the original images via our HTTPS data server. You can find the original image corresponding to the three images we retrieved earlier at this URL. There are couple of key points to remember when accessing images this way:
- Instead of date, the archive uses the year and day of the year to organise and name files. There are online resources such as here to find the day of the year for any date.
- The date and time are in Universal Time (UTC), not in local time. This is the convention for scientific data such as these and avoids any confusion around time zones and daylight saving. UTC is 12 hours behind New Zealand Standard Time, and 13 hours behind New Zealand Daylight Time. There are many online resources for converting local time to UTC, just Google “nzst to utc converter".
Here’s a comparison of the size of all four images. As you can see, the “original’ image is so much larger than even the “large” image and consequently shows much more detail. If you need to examine an image in great detail or perhaps you want to manipulate an image in some way, then you might want to work with the “original” image.
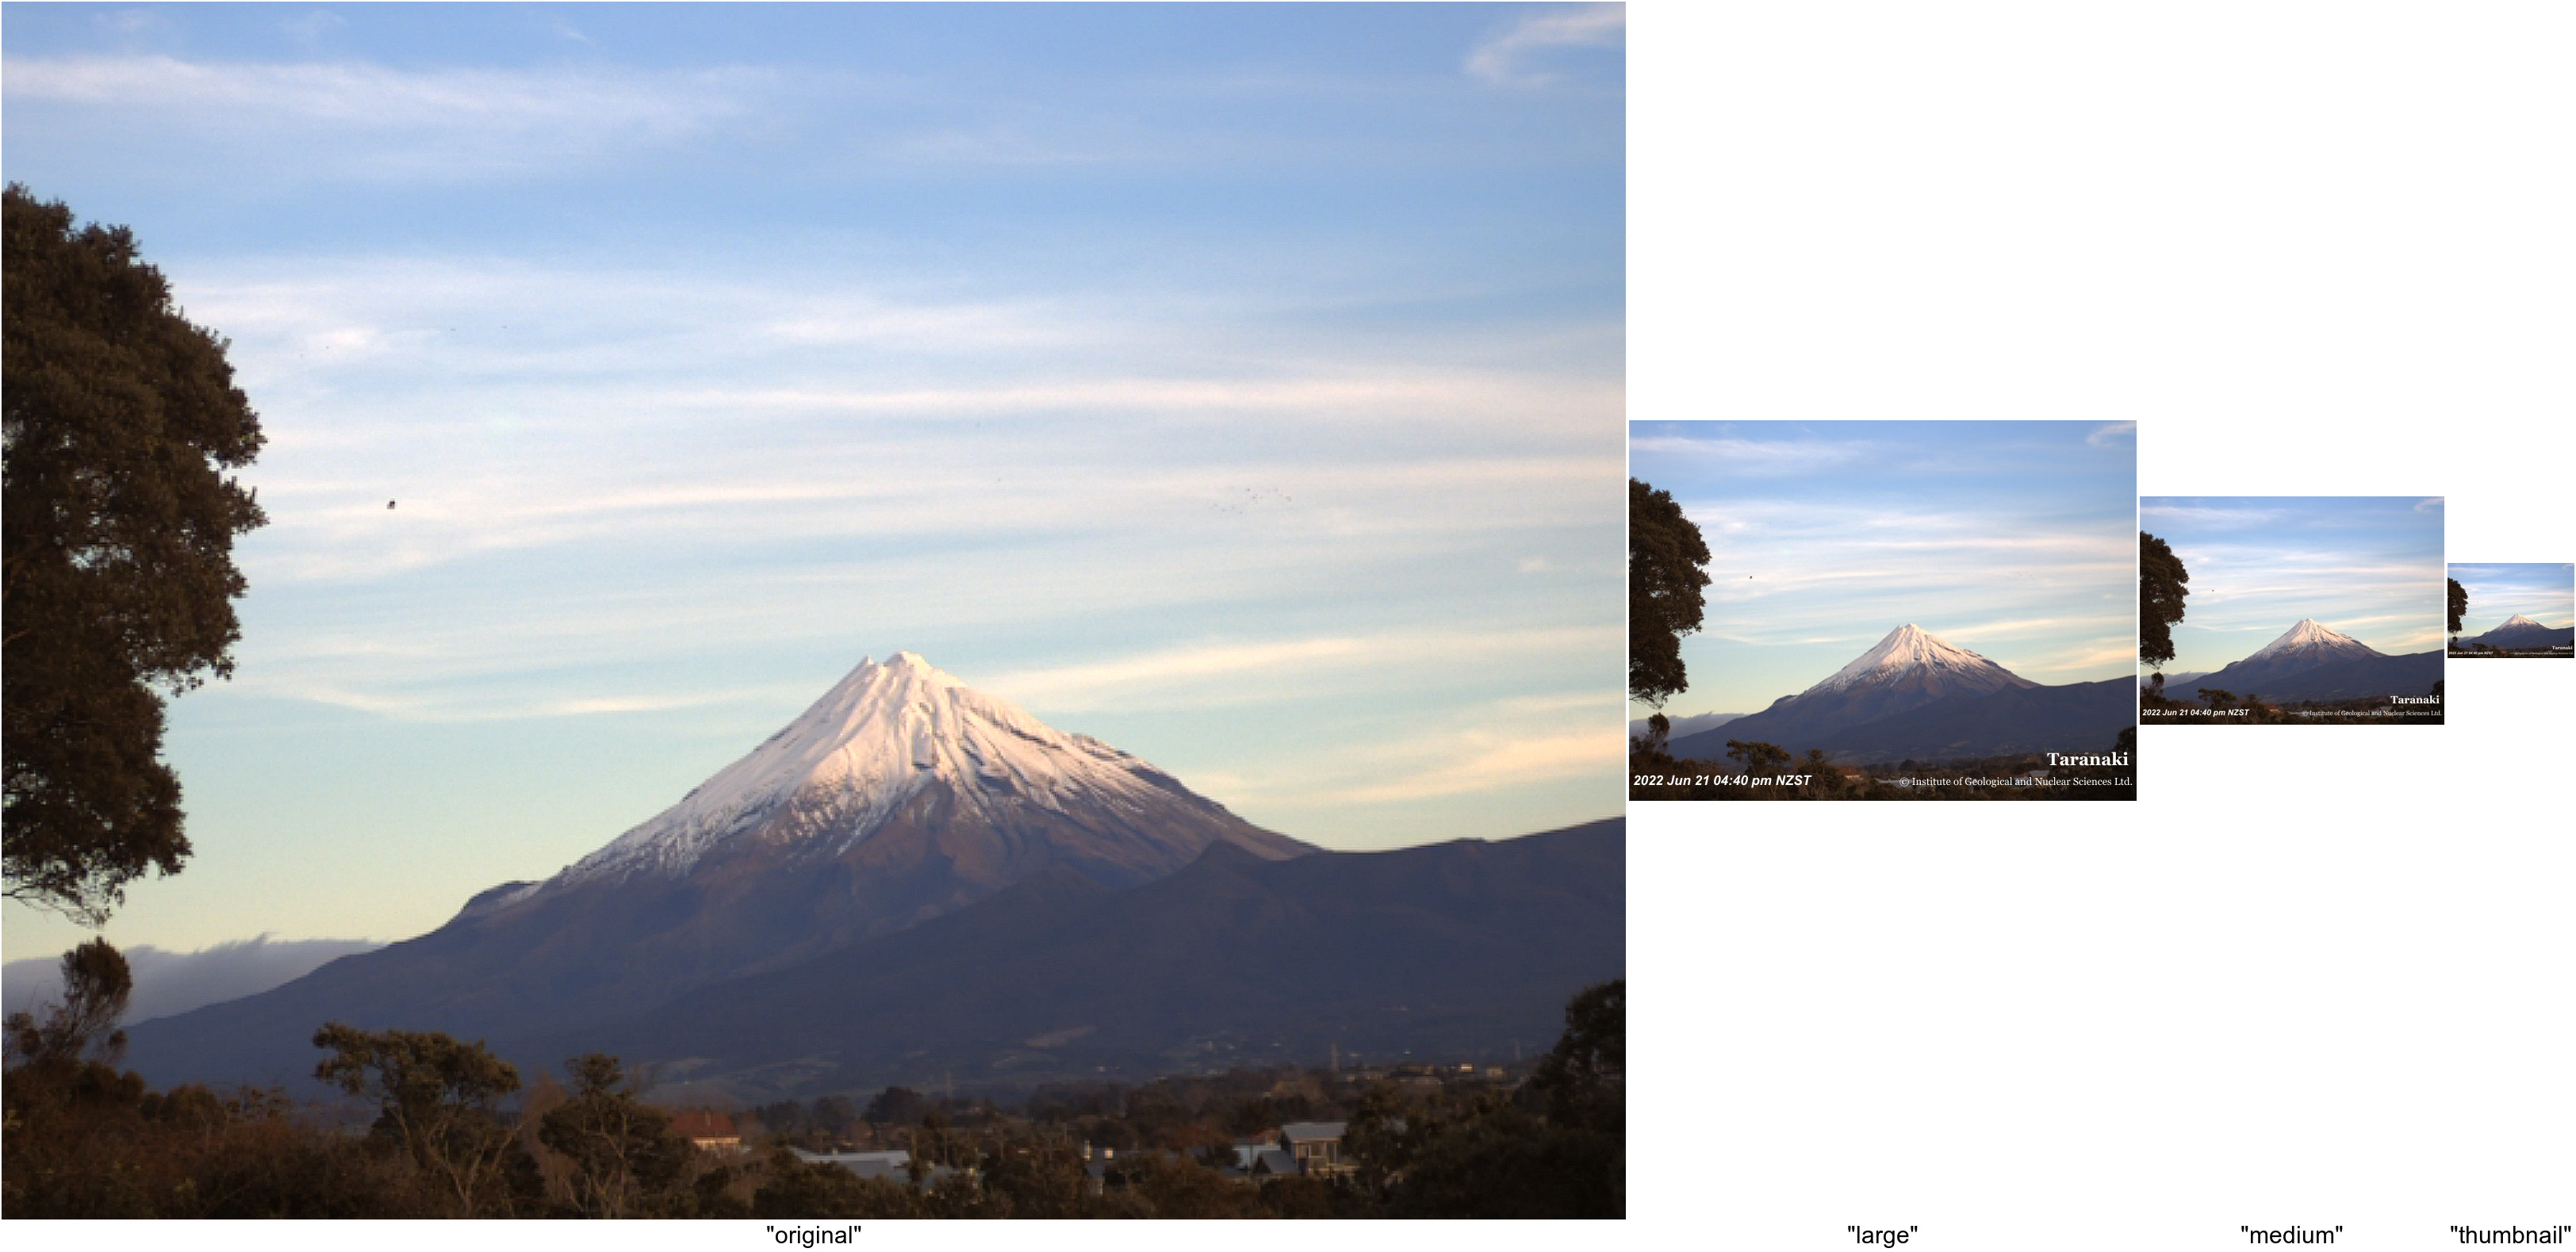
Comparison of the size of all four images
There’s one final thing to say on accessing webcam images. If you need a lot of images, access through our HTTPS server will be impractical, as you need to select and download images individually. It’s better to use an open-data copy of our webcam cloud storage at Amazon Web Services. We are planning to write a future blog on this subject, and possibly make a data tutorial too.
Daytime and night-time images?
If you’ve ever spent some time looking at our webcam images, you’ll probably have noticed that some are colour and some aren’t. What’s going on here? Well, the default configuration we use for our webcams has two lenses, one for daytime and one for night-time. The daytime lens takes normal colour images, like the ones shown earlier. The night-time lens takes greyscale (also called monochrome or black and white) images, with some limited capability to show heat. Based on the ambient light conditions, the camera itself decides when to switch from daytime lens to night-time lens and back again. This is what we are talking about.
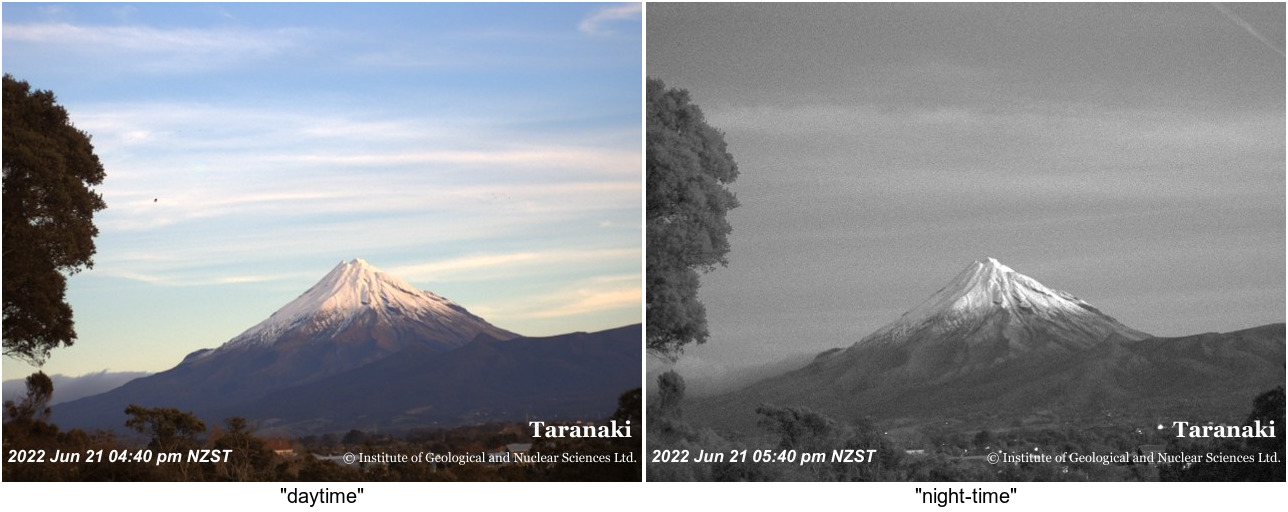
Day vs night-time images
The left image is the one you’ve seen before, taken at 4:40 PM. The right image was taken an hour later at 5:40 PM, by which time the camera had switched to the night-time lens. This may seem a bit early in the evening to switch lenses, but it was the winter equinox, the shortest day of the year!
As the camera decides when to switch between lenses, we don’t know if we are downloading a colour image or a greyscale image, so they aren’t distinguished in any way in our archive.
If you need just daytime or night-time images, how might you go about it?
In most cases the lens used will be obvious – like in the middle of the day or night – but around the lens transition time you would need to check each image to know which lens was used. If you only need a few images, then we suggest the quickest method would simply be to look at them. If you need to distinguish between lenses for many hundreds or thousands of images, you need to have some basic understanding of digital camera images.
Our images use the common JPEG file format for digital photographs. Anyone familiar with digital photography will be aware that colour images have three channels, corresponding to red, green, and blue (RGB) colours, and greyscale images only have one, that simply corresponds to the intensity of light. Normally, you could interrogate a JPEG image file, find out how many channels and use that to discriminate the daytime lens from the night-time lens.
Unfortunately, the greyscale images created by the webcams we use have three channels! This is probably some quirk of the camera’s software, but to be honest we don’t know why it is. Fortunately, each channel in a greyscale image is identical, so you can compare the content of red, green and blue channels and if they are all the same safely conclude that the image is greyscale, i.e., from the night-time lens.
Here’s how you can split an image into its RGB channels, again using ImageMagick. This gives you three images, called channel0.jpg, channel1.jpg, and channel2.jpg.
%d.jpg
convert -channel RGB -separate taranaki.jpg channel
We’ve done this for our daytime image (top) and our night-time image (bottom). You can see that RGB channels are different for the daytime image and the same for the night-time image.
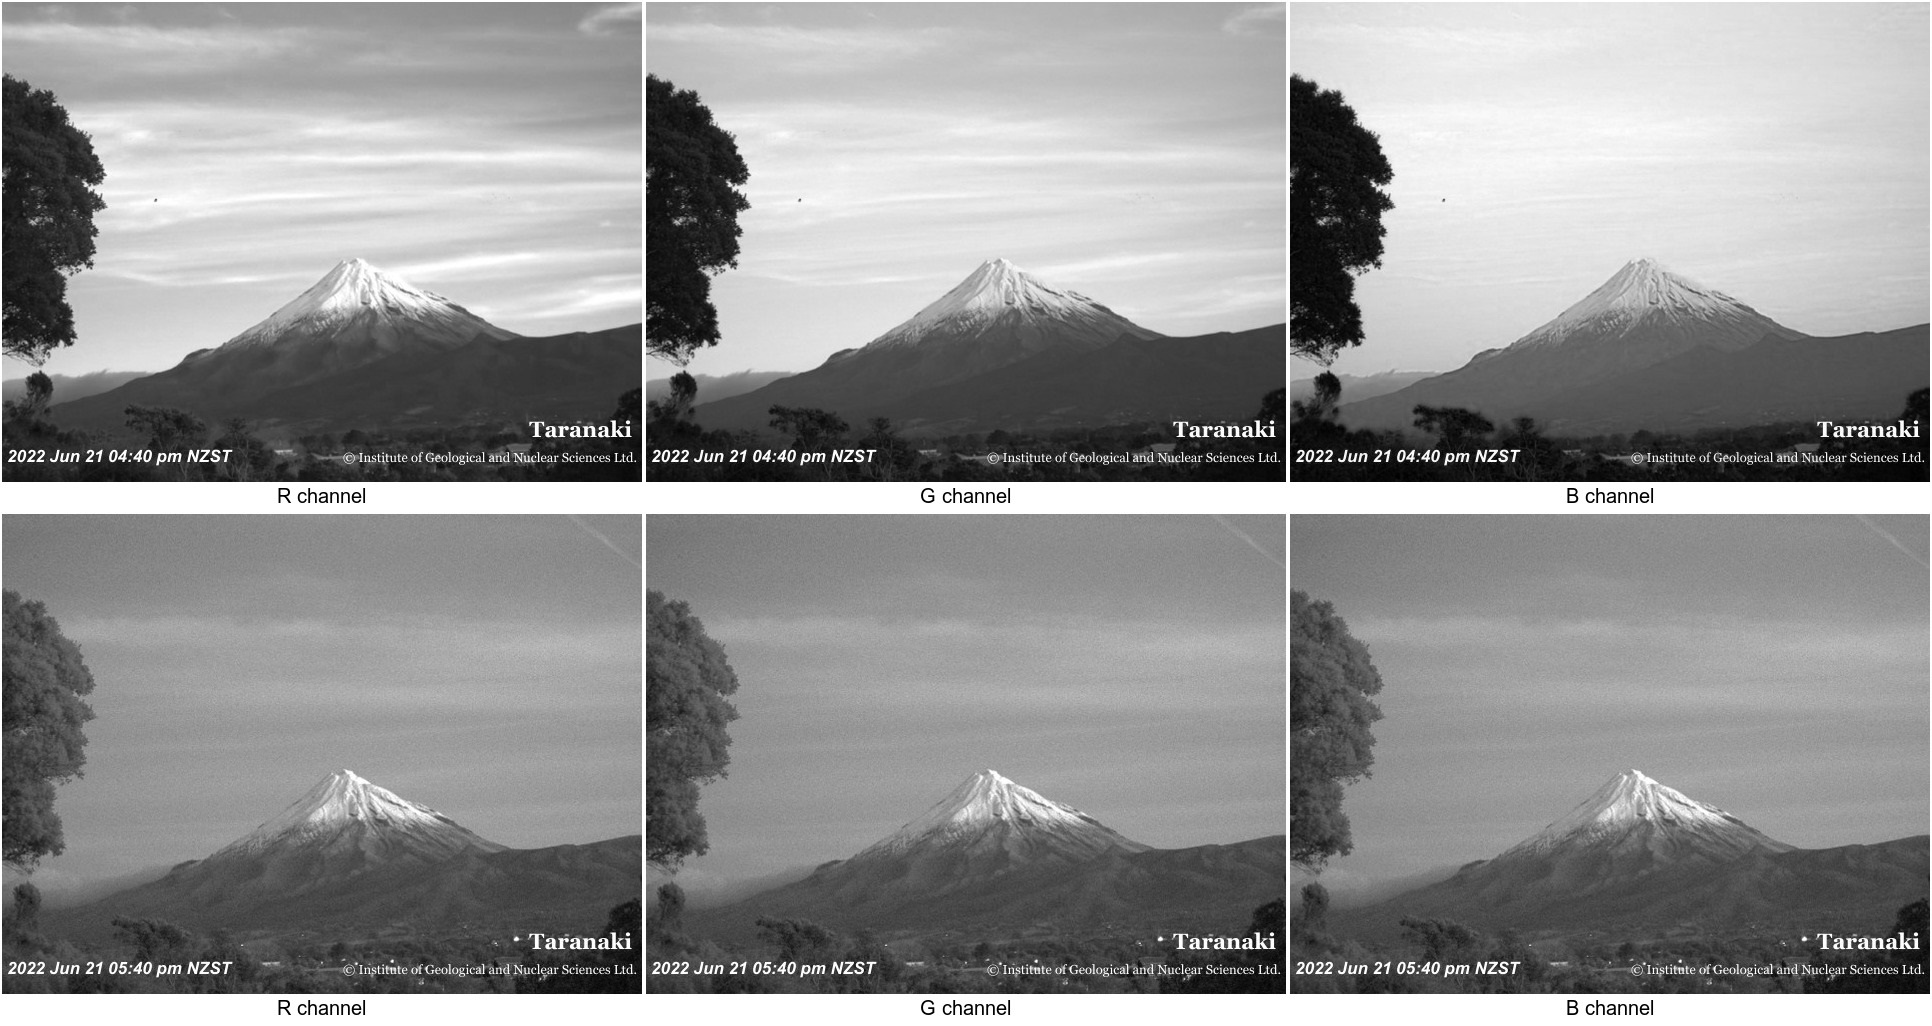
Daytime image (top) vs our night-time image (bottom).
If you have a lot of images, then you’ll want to do this automatically. Rather than comparing every pixel’s value (light intensity) to the value of the same pixel in the other two channels in the image and seeing if they are the same, the comparison can be done at the level of the whole image using statistics of each channel’s pixel values. Here we use the standard deviation of pixel values in each channel, which indicates the variation of pixel values in each image. Below is an example command for the red channel.
convert taranaki.jpg -channel R -separate -format "%[fx:standard_deviation]" info:
Here’s what you’ll get if you do this with the daytime and night-time images we showed earlier.
| Image | R std dev | G std dev | B std dev | Grayscale? |
| Daytime | 0.286897 | 0.308634 | 0.326799 | no |
| Night-time | 0.167115 | 0.167115 | 0.167115 | yes |
The actual values aren’t what’s important here: that the values are the same for all three channels in the night-time image is what identifies it as such. Other statistical measures like the average could tell us the same thing, granted its value is the same across the three channels!
That’s it for now
There are other things we can cover around using webcam images, including basic image enhancement, cropping to show just part of a view, and making videos, but we’ll leave those for another day.
You can find our earlier blog posts through the News tab on our web page, just remember to select the Data Blog filter before hitting the Search button.
We welcome your feedback, and if there are any GeoNet data topics you’d really like us to talk about, please let us know. Ngā mihi nui.
Contact: info@geonet.org.nz